How to create SharePoint list instance / List Definition from an existing List
There are many ways to create a SharePoint list instance/list definitions in your web Part projects.
- Manually add List definitions ,list instances and create the solution.
- Save the list as a template and manually modify the schema.xml file, from the element.xml file given by the template.etc
Crating an list instance to your SharePoint project is no longer a difficult task for a developer if your following these steps.
Step 1
Go to you share Point site and create a custom List . in this example I am going to create a list called TestList.

Step 2
Create the columns as per your need.
 Step 3.
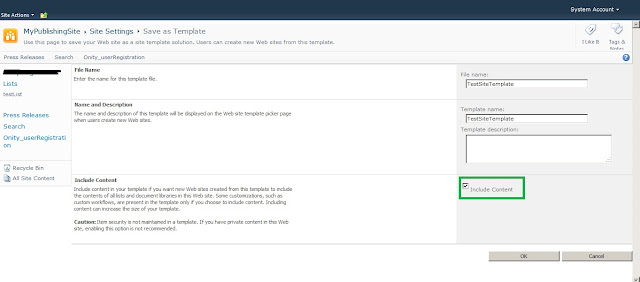
Move to the site action - > site settings. under site actions click on save site as template link.
 Step 4.
After you save the template you can find the template inside the Solution gallery.
you can move the solution gallery by clicking on the link appears soon after you save the template.
or you can go to site action - >site settings -> under Galleries Solutions
 Step 3.
Move to the site action - > site settings. under site actions click on save site as template link.
Note:if your have a publishing site deactivate the following features in order to perform this operations.(Otherwise save site as template link will not appear)
- site collection feature
- SharePoint Server Publishing Infrastructure
- site feature
- SharePoint Server Publishing
 Step 4.
After you save the template you can find the template inside the Solution gallery.
you can move the solution gallery by clicking on the link appears soon after you save the template.
or you can go to site action - >site settings -> under Galleries Solutions
The saved template appears here.Click on the template(Web service package) and save the template in your local machine.

Step 5.
Move to visual studio project .File - > Add - > new project select Import share point solution package project from the list.
provide a name ,select a location and save the project.
Alternatively you can open up a new - > project -> Import share point solution package
follow the wizard appears.
- Give the share point site name.
- Browse the template(Web service package) you have saved in the step 4.
- Click finish

Step 6.
Open up the project you have created in the windows Explorer.Inside the List Instances folder you can find the list instance you have created.

Step 7
Now you can add this list instance to your project . Create a folder named as List Instance in you project
Copy the list instance into your project by open up your project in the in the Windows explorer.
Now you can include this list instance to to the project by click on the Show all files - >Include in project

Step 8.
Now you have added the list to your site.But in order to include this list with the deployment .You have to create a New feature and add the list instances and the modules.
Hi Mafas, Great post Thanks
ReplyDelete